Okay, I have had a few friends ask and a few e-mails from others who asked about how I make my layouts look like they have a shadow. I guess I assume that since I am not a computer genius, most people know what I know. I don't have any big secrets or mad skills when it comes to computers or PSE, but I can navigate enough to make due. I am not sure if this is the easiest way to add a drop shadow or not, but it works for me. And it is easy for me because it is what I know and I am happy with it. I will share here what I do for those of you who had questioned me. For those of you who don't care, you can stop reading now, so you are not bored to death. I use PSE 4 because I am too afraid to upgrade and lose all of my actions. I am sure the process is similar in other versions of PSE. Again, this is what works for me, and I am sure there are easier/better ways. I am an old dog who is happy with my old tricks...LOL!
Adding a Drop Shadow
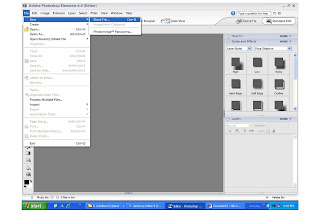
In PSE, Go under the File Menu; choose New and then Blank File.

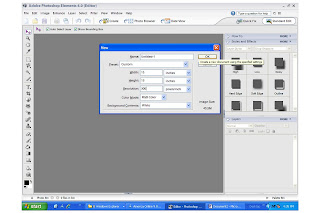
For the Height and Width, I usually choose 13 inches for both because I normally scrap 12x12. If you are working with another size layout, you would create your blank page at about 1 inch larger than your layout. For example, an 8.5 x 11 layout would have a canvas of 9.5 width and 12 height. Either way, your Resolution is 300 pixels/inch and your Color Mode is RGB Color.

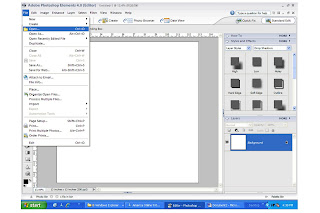
Under the file menu, choose open to open the scanned image or photographed layout that you want to add to your blank page.

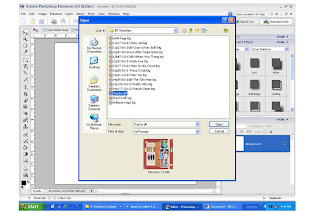
Find your saved file and click open.

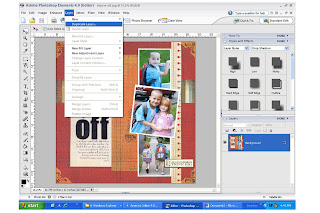
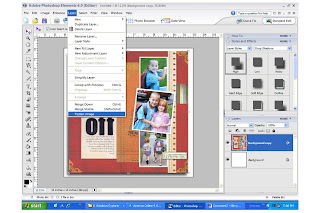
Under the Layer Menu, choose Duplicate layer.

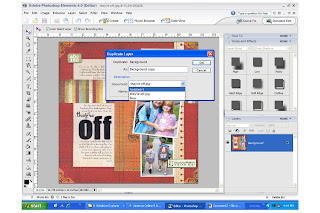
In the dialog box, choose Untitled 1 as your document and click ok.

You can close your scan/photograph now and see that it has been copied into your blank document.
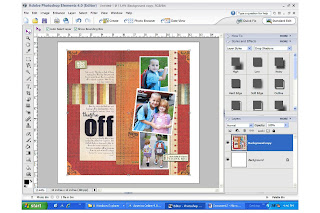
Making sure that your image layer is the active layer, use the drop down box under Styles and Effect to choose Layer Styles while the drop down box next to it should say Drop Shadows.

Choose High as your shadow type, and you will see the shadow appear on your image.
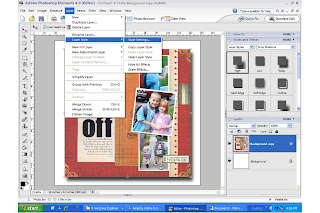
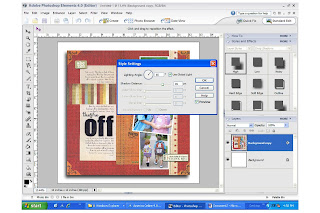
 I don’t really like the way the shadow looks as it first appears, so I tweak it to my taste. You can change the shadow however you like until you find one that makes you happy. To do so, go under the Layer Menu, choose Layer Style, and then Style Settings.

Another Dialog box will come up. For Lighting Angle, I choose 55 degrees and for Shadow Distance, I choose 85 px. The shadow will move as you adjust these numbers and you can see it before you commit to it. When you are happy, hit ok.

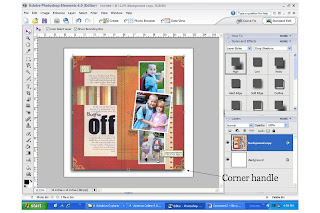
You can resize your image to fill the blank page better by holding down the Shift key while dragging a corner handle. The Shift key keeps the proportions correct.

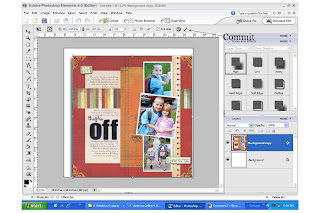
Once you have resized, hit the Commit button to make the size change.

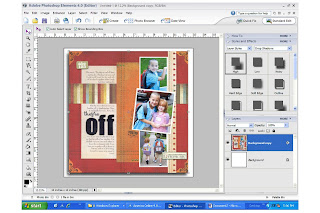
You can then drag the image so that it is centered in the middle of the page.

Under the Layer Menu, Choose Flatten Image to merge your layers.

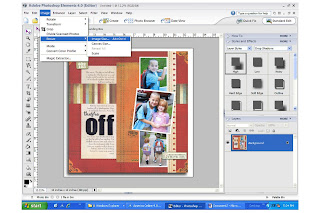
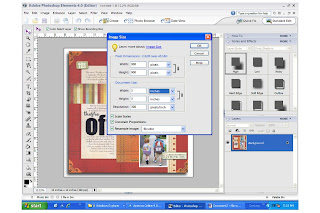
If you plan on displaying this on the web, you will need to resize so the file is not so big. Under the Image Menu, choose Resize, and then choose Image Size.

Another Dialog box will come up. Here, I change the width and height to 3 inches. Hit ok.

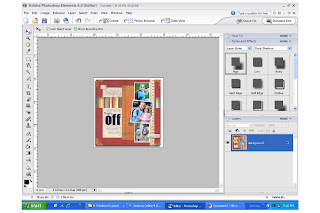
It will get much smaller on your screen; you can enlarge it by pointing at it with your mouse and scrolling in with the mouse wheel.

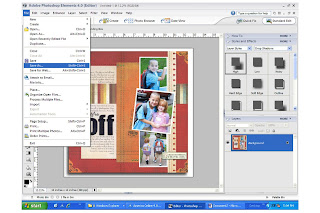
Now you just have to save it. Under the File Menu, choose Save As.

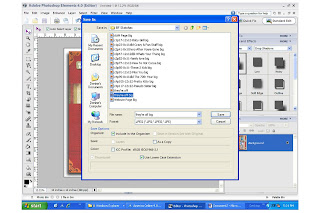
Choose the folder where you would like to save it. Give it a name, and save it as a JPEG file. Hit Save.

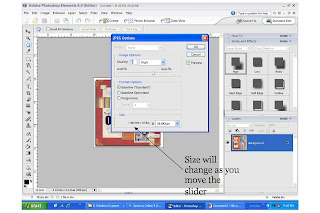
In the Dialog box that comes up, drag the Quality slider down so that the size is below 500K. I usually use a quality of about 8 or 9. As you move the slider, the size will automatically change. Hit ok.

That’s it. I know it seems like a lot of steps, but it really takes no time at all once you get used to it! Good Luck and feel free to leave a comment or e-mail me with any questions! Also, if you would like me to send these instructions to you in Word format, please leave a comment with your e-mail or e-mail me for that, too!
Have a great night!
 I have not had too much of a chance to work with it because we just got it yesterday and Ryan loves it! I have a feeling that we will be fighting over this game. I will be sure to give my full review once I get started. Tomorrow is looking good because Ryan goes with his Dad...that is, of course, if he does not take it with him! I might have to buy one for myself!


 You have got to love a punch that makes any paper look like it has been torn out of a spiral bound notebook. I find myself reaching for this little punch very often. The best thing about it...the little guide on it that helps you to line it up each time you punch. Cutting a 12 inch border is a piece of cake! It is excellent quality,too...sturdy and easy to hold.


